

Starting with a brief understanding of the VMware Workstation Pro, this article covers how to download and install it on Windows using a simple and step-by-step approach.
Brief Understanding
VMware Workstation Pro is a popular virtualization software available for desktop and server operating systems. Virtualization is the technology that enables you to run multiple OS on a single physical computer. For example, if you want to test different versions of Windows OS and/or Linux OS on your computer, the virtualization software is out there to help you. Another most used example is creating a virtual lab for learning, testing, and practicing your system administration knowledge. And the list goes on!
With tens of virtualization software available, the VMware workstation Pro is one of the most used and well-known software. It gives you a free 30-day fully-functional trial. It is the virtualization software that I use for my home lab. And throughout the rest of this article, you will learn how to download and install VMware Workstation Pro on your Windows system.
To use VMware on your computer, your computer must support virtualization. Also, you need to enable virtualization in the BIOS settings of your PC if it is disabled.
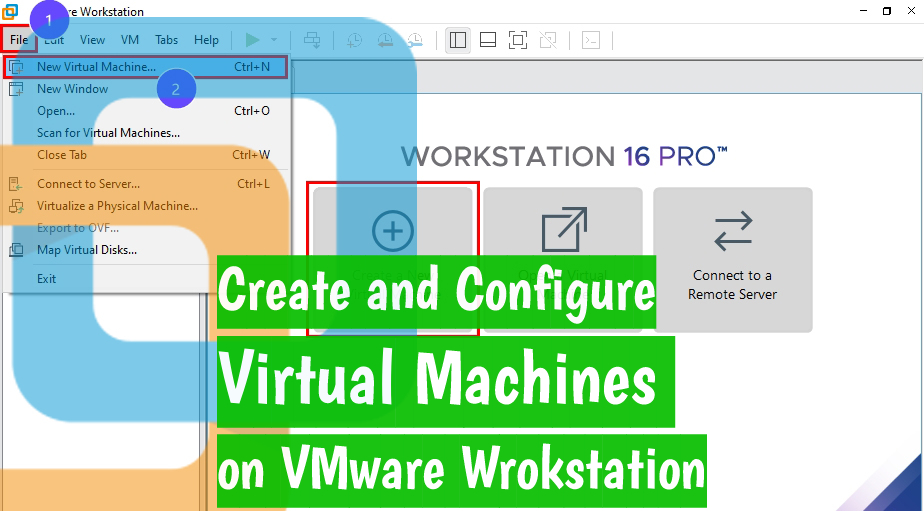
RELATED: Create and Configure a New Virtual Machine in VMware Workstation Pro
Download and Install VMware Workstation Pro on Windows
As mentioned earlier, you can download and use the free 30-day fully-functional trial of the VMware Workstation Pro. You should purchase it after the trial ends. Anyway, let’s discuss the steps to download and install the VMware Workstation Pro on a Windows machine.
- Go to the download page HERE for the latest version. Then, click on the Download Now button below the Windows version of the VMware Workstation Pro.
- Once the download is completed, find it on your computer and double-click on the installer to start the installation. Click on the OK button on the UAC screen.
- Click Next on the Welcome wizard.

- On the License Agreement wizard, read the license agreement and check the box associated with it. Then, click Next to continue the installation.

- You have the option for minor customization if you want to. On the Custom Setup page, you can choose if you want to use Enhanced Keyboard Driver and if you want to add the VMware console tools to the system path. Do the customization and then click Next to continue.

- The next screen is to set the user experience. Check out the first option, and VMware will notify you when there is an update. Also, check the second one if you want to join VMware CEIP. Finally, click on Next to continue.

- Now, set the shortcut settings for the VMware Workstation Pro and click Next to continue.

- At this step, you are ready to install the VMware Workstation Pro. If all previous settings are correctly set, click on the Install button. Wait for a while until it finishes the installation.

- Once the installation is completed, click the Finish button to close the window. If you own a license key and want to use it, use the License button and provide the key.

All right! To this end, you have successfully downloaded and installed the latest version of the VMware Workstation Pro on your Windows computer. Your system will prompt you to perform a restart. After the system restart, you can launch VMware and use it.
RELATED: 3 Ways to Enable and Disable Hyper-V in Windows 11.
Conclusion
Firstly, this article covered a brief understanding of the virtualization concept. Then, with a step-by-step approach, it covered how to download and install the VMware Workstation Pro on a Windows machine.
I hope you find this guide helpful. Also, please do not hesitate to share your thoughts and questions in the comment section.
You may also like: Free Download Windows 11 ISO File (Latest Version 64-bit).
It was helpful.
Thank you.